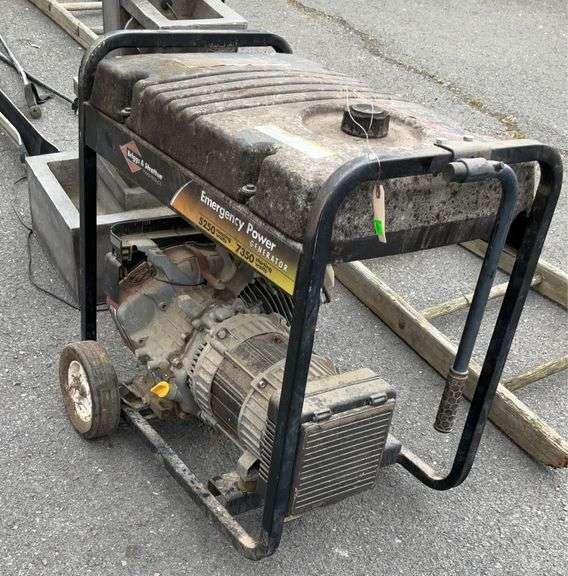
The moment the lights flicker and die, your Briggs & Stratton emergency generator becomes your household's lifeline. But what happens when you pull the cord, hit the start button, and... nothing? Or worse, it sputters, struggles, and then falls silent? That's when effective Briggs & Stratton Emergency Generator Troubleshooting becomes essential. There's little more frustrating than having backup power that won't cooperate when you need it most.
As a seasoned journalist who's weathered my share of outages (and generator tantrums), I can tell you that most issues aren't deal-breakers. Often, a systematic approach, a little patience, and the right know-how can get your generator humming again, illuminating your home and keeping your essentials running. Forget panic – this guide is designed to transform you from a bewildered owner into a confident problem-solver.
At a Glance: Key Troubleshooting Takeaways
- Fuel First: The most common culprit is old or low fuel. Always start here.
- Oil is King: Low or dirty oil can prevent starting or cause shutdowns.
- Spark & Air: A bad spark plug or clogged air filter often causes rough running or no-starts.
- Check the Breakers: If the engine runs but there's no power output, look for tripped circuit breakers.
- Overheating? Ensure good ventilation and clean cooling components.
- CO Light: A persistent blinking blue or red light indicates a CO shutdown system issue.
- Manual Matters: Your owner's manual is your ultimate authority.
Understanding Your Briggs & Stratton: A Quick Primer
Briggs & Stratton generators are a popular choice for backup power, known for their reliability. However, like any piece of machinery, they're susceptible to a few common issues. Before we dive into the fixes, it helps to understand the typical scenarios you might face:
- It won't start: The engine won't turn over, or it tries but fails to catch.
- It starts but then stalls or runs rough: The engine fires up but can't maintain steady operation.
- It runs, but there's no power output: The engine sounds fine, but your appliances aren't getting electricity.
- It's overheating: The generator feels excessively hot or shuts down unexpectedly.
We’ll tackle each of these systematically, giving you a clear path to diagnose and resolve the problem. Remember, safety first: always disconnect the spark plug wire before working on any engine components to prevent accidental starts.
Deep Dive: Troubleshooting Specific Generator Scenarios
Let's break down the common problems and walk through the solutions step-by-step.
1. When Your Generator Refuses to Start
This is perhaps the most common (and frustrating) issue. If your Briggs & Stratton generator is stubbornly silent, here's where to begin your investigation.
a. The Fuel System: Your First Suspect
More often than not, starting problems trace back to the fuel. Gasoline doesn't last forever, and issues can arise from contamination or simple neglect.
- Check Fuel Levels and Freshness: Ensure your tank has enough gasoline. If the generator has been sitting for more than 30 days without fuel stabilizer, that old fuel is now likely stale, potentially forming varnish that clogs the carburetor. If it smells sour or looks murky, drain it completely and replace it with fresh, clean fuel. For future storage, make it a habit to add fuel stabilizers to any gasoline that will sit in the tank for more than a month.
- Open the Fuel Valve: This might seem obvious, but it's an easy oversight. Many Briggs & Stratton models have a manual fuel shut-off valve; ensure it's in the "ON" or "OPEN" position.
- Inspect Fuel Lines: Look for any visible kinks or cracks in the fuel lines that might restrict flow. A tiny crack can allow air in, preventing proper fuel delivery.
b. Oil Level: The Engine's Lifeblood
Low oil levels are a frequent culprit for no-start situations, thanks to modern generators' low-oil shutdown features designed to protect the engine.
- Verify Oil Level and Quality: Locate the dipstick (usually yellow or orange). Remove it, wipe it clean, reinsert it (without screwing it in on some models, check your manual), then remove it again to read the level. It should be at the "FULL" mark. If it's low, add the recommended type and amount of oil. If the oil looks very dark or sludgy, it's probably due for a change.
c. The Spark Plug: Igniting the Fire
A clean, properly gapped spark plug is crucial for combustion.
- Inspect, Clean, or Replace the Spark Plug: Carefully remove the spark plug using a spark plug wrench. Inspect the electrode for signs of wear, corrosion, or heavy carbon deposits (black, sooty buildup). If it's just a bit dirty, you can try cleaning it with a wire brush. However, if it's heavily fouled, corroded, or the electrode is visibly worn, it’s best to replace it. Always ensure the gap is correct according to your generator's specifications (check your manual) and that the spark plug wire is securely connected.
d. Air Filter: Letting the Engine Breathe
A clogged air filter starves the engine of oxygen, making starting difficult or impossible.
- Check the Air Filter: Open the air filter housing and remove the filter element. If it's dirty, dusty, or oil-soaked, clean or replace it as recommended by Briggs & Stratton. Some foam filters can be washed and re-oiled, while paper elements typically need replacement.
e. Battery Check (Electric Start Models)
If your generator has an electric start, the battery needs to be in top shape.
- Battery Charge and Terminals: Ensure the battery is fully charged. Low voltage won't be enough to crank the engine. Check the battery terminals for corrosion (a white, powdery substance). Clean any corrosion off with a wire brush and a solution of baking soda and water. Ensure all connections are tight.
f. Coolant Levels (Liquid-Cooled Models)
While less common on smaller portable units, some larger or enclosed emergency generators may be liquid-cooled.
- Verify Coolant Level: If your model uses coolant, check the reservoir level. Low coolant can trigger a shutdown, though it's more often associated with overheating.
2. When It Starts, But Stalls or Runs Unevenly
So, your generator sparks to life, but it’s chugging like an old train, or it simply dies after a few moments. This usually points to fuel delivery or air-fuel mixture issues.
a. The Carburetor: The Mixer's Miseries
The carburetor is responsible for mixing fuel and air. It’s highly susceptible to clogs from stale fuel.
- Clean the Carburetor: This is a more involved step, but often necessary. Varnish and dirt from old fuel are notorious for clogging tiny jets and passages within the carburetor. You'll need to disassemble the carburetor, clean the jets and the float bowl with an approved carburetor cleaning solvent. This process requires a bit of mechanical comfort; if you're unsure, consulting a professional might be wise, as improper reassembly can cause more issues.
b. Airflow and Ventilation: Don't Suffocate It
Just like us, an engine needs to breathe.
- Ensure Clear Airflow: Check that no objects or debris are blocking the generator’s ventilation openings. Operating your generator in an enclosed space can restrict airflow and also lead to dangerous carbon monoxide buildup (more on that in a moment).
c. Fuel Quality Revisited: Water is the Enemy
Even if the fuel isn't stale, it could be contaminated with water.
- Check for Water Contamination: Water is heavier than gasoline and will settle at the bottom of the fuel tank. You can often see it if you carefully drain a small amount from the tank into a clear container. If you find water, you'll need to drain and replace all the fuel, possibly cleaning the tank thoroughly.
d. Idle Speed: Fine-Tuning the Rhythm
Sometimes, the idle speed might simply be out of adjustment.
- Adjust Idle Speed: On some carburetors, there's an idle speed adjustment screw. Consult your generator's manual for specific instructions on how to adjust it to the manufacturer’s specifications. Too low an idle speed can lead to stalling, while too high can cause excessive wear.
3. When It Runs, But Produces Low or No Output Power
The engine's purring, but your extension cords are just lying there, useless. This indicates an issue with the electrical generation system.
a. Circuit Breaker: The First Line of Defense
This is the easiest fix for no power output.
- Check and Reset the Circuit Breaker: Locate the main circuit breaker on your generator's control panel. If it's tripped (usually in the "OFF" position or clearly indicated), switch it firmly to "OFF" and then back to "ON" to reset it. Overloading the generator is the most common reason for a tripped breaker.
b. Fuses: Small but Mighty Protectors
Some generators also have fuses to protect specific circuits.
- Inspect and Replace Fuses: If your generator has a fuse box, open it and inspect the fuses. A blown fuse will typically have a broken filament inside or a charred appearance. Replace any blown fuses with new ones of the exact same rating (amperage). Never use a fuse with a higher rating.
c. Power Connection: The Simple Connection
Sometimes the problem isn't the generator itself, but how it's connected.
- Inspect Power Connections: Ensure your power cord is securely plugged into the generator's outlet. Check the other end for secure connection to your electrical panel or appliance. Try plugging the generator into a different outlet on the panel, or testing a different appliance, to rule out a faulty receptacle on the generator itself. For a comprehensive overview of your generator, consider reviewing our Briggs & Stratton emergency generator guide.
d. Electrical Connections: The Hidden Wires
Loose internal wiring can disrupt power flow.
- Tighten Wiring Connections: If you're comfortable, visually inspect and gently tighten all wiring connections between the engine and the generator’s alternator on the control panel. Be extremely cautious with electrical components, and ensure the generator is off and spark plug disconnected.
e. Voltage Output: The Multimeter's Tale
A multimeter is a handy tool for diagnosing electrical output.
- Test Voltage Output: Using a multimeter, carefully test the voltage output at the generator's receptacles. If the voltage is irregular or completely absent, it suggests a problem with the internal generation components.
f. Voltage Regulator & Brushes: The Heart of AC Power
These components are critical for producing stable AC power.
- Check Voltage Regulator & Brushes: The voltage regulator maintains a steady output voltage. The brushes transfer power. If either of these components is worn or malfunctioning, it can lead to low or no power output. Replacing these parts can be straightforward for some, but often requires a technician.
g. Load Testing: Pushing the Limits
If your generator seems to work but struggles under load, a load test can pinpoint issues.
- Perform Load Testing: Connect a known load (e.g., a few light bulbs, a small heater) to the generator and observe its performance. Gradually increase the load and monitor the voltage. If the voltage drops significantly or the generator struggles, it indicates a capacity issue or internal problem.
4. When Your Generator is Getting Too Hot
Overheating isn't just uncomfortable; it can lead to engine damage and automatic shutdown.
a. Ventilation: Let It Breathe Freely
The most common reason for overheating is inadequate airflow.
- Ensure Proper Ventilation: Always operate your generator in a well-ventilated outdoor area. Never place it too close to walls, fences, or other obstructions that could block the cooling vents. Leave ample space around all sides for air to circulate.
b. Cooling System: Keep It Clean
Dirt and debris can act as insulation, trapping heat.
- Clean Cooling Fins and Air Filters: Regularly inspect and clean the cooling fins on the engine and any dedicated air filters for the cooling system. Dust, grass clippings, and other debris can accumulate, severely impeding heat dissipation. A brush or compressed air can work wonders.
c. Oil: The Right Type, the Right Level
Oil not only lubricates but also helps cool the engine.
- Use Proper Oil Type and Maintain Level: Ensure you're using the correct type and viscosity of oil recommended in your Briggs & Stratton manual for your operating temperature. Using the wrong oil or having low oil levels can contribute significantly to overheating. Check the oil level frequently and change it regularly as per manufacturer guidelines.
Decoding the Blinking Blue Light: CO Shutdown System
Many modern Briggs & Stratton generators feature a CO (Carbon Monoxide) shutdown system for safety.
- Understanding the Light: When you start your generator, you'll typically see a blinking blue light for approximately 5 seconds. This is normal and indicates the CO shutdown system is functioning and checking itself.
- What if it keeps blinking or flashes red? If the blue light continues to blink for an extended period, or if it flashes red, it signals an issue with the CO shutdown system itself. This doesn't necessarily mean there's a CO leak, but it indicates the safety system isn't operating correctly. In such cases, the generator may shut down, or refuse to start. You should consult your manual and consider seeking professional assistance to diagnose the CO sensor system.
Proactive Power: Regular Maintenance Essentials
The best troubleshooting is preventing problems in the first place. Regular maintenance is key to keeping your Briggs & Stratton generator ready for action.
- Oil Changes: Perform routine oil changes every 50 hours of operation or at least once annually, whichever comes first. This keeps the engine lubricated and cool.
- Spark Plug Replacement: Inspect your spark plug every 100 hours of operation. Replace it if you notice significant electrode wear or heavy fouling.
- Fuel Stabilizer Usage: If you're storing your generator for more than 30 days, always add a high-quality fuel stabilizer to the gasoline. Run the generator for a few minutes after adding the stabilizer to ensure it circulates through the carburetor.
- Carburetor Inspection: Even with stabilizer, it's a good idea to inspect and clean the carburetor at least once a year, especially if your generator isn't used frequently.
- Battery Maintenance (Electric Start Models): Keep the battery charged during storage, especially in cold weather. Use a trickle charger if possible. Clean terminals regularly.
Beyond DIY: When to Call the Pros
While many common issues are solvable with a bit of DIY effort, some problems warrant professional attention. Don't hesitate to consult a certified technician if:
- Persistent Starting Failures: You've tried all the basic troubleshooting steps, and your generator still won't start.
- Electrical System Malfunctions: You suspect issues with the alternator, complex wiring, or voltage regulator that go beyond simple fuse replacement or circuit breaker resets. These can be dangerous to tackle without expertise.
- Major Engine Repairs: Problems like piston damage, valve issues, or persistent oil leaks that indicate internal engine trouble are best left to professionals.
- Warranty Concerns: For warranty-related repairs or to ensure genuine replacement parts, always use authorized Briggs & Stratton service centers.
- CO System Alerts: If the blinking blue light continues for an extended period or flashes red, indicating a fault with the CO shutdown system, it's a safety-critical issue that needs expert diagnosis.
Your Go-To Resources
Even with a comprehensive guide like this, nothing beats the specifics of your model.
- Your Official Manual: This is your primary resource. You can often find detailed instructions, diagrams, and model-specific troubleshooting charts by visiting the Briggs & Stratton website's support section, or searching for a digital copy using your generator's model number. Keep a physical copy handy with your generator.
- Online Resources: Briggs & Stratton's official website offers FAQs, troubleshooting videos, and articles. Online forums and communities dedicated to generators can also provide valuable peer advice. However, always cross-reference any online advice with your official manual to ensure it applies to your specific model and doesn't contradict manufacturer guidelines. YouTube tutorials can be excellent visual aids, but again, verify the information.
Empowering Your Emergency Preparedness
Troubleshooting a Briggs & Stratton emergency generator doesn't have to be daunting. By methodically checking the fuel, oil, spark, and air systems, and understanding the electrical components, you can often diagnose and fix issues yourself. Regular maintenance is your best defense, ensuring your generator is ready to go when you need it most.
Remember, a functioning generator during an outage is more than just a convenience; it's a critical tool for safety and comfort. Take the time to understand your machine, keep up with its maintenance, and you'll be well-prepared for whatever the weather (or grid) throws your way.